Transparent LED Display Installation Instruction
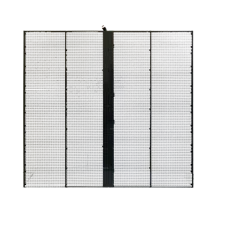
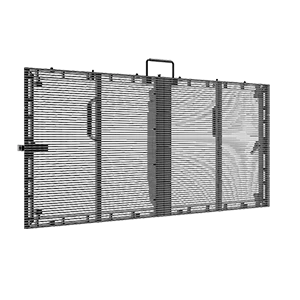
As shown in the left picture, it is the effect of hoisting installation.
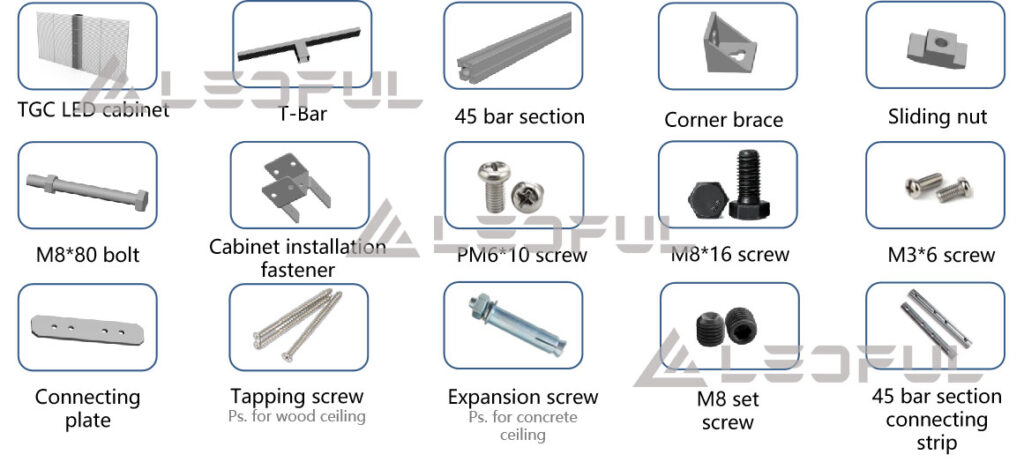
Confirm the installation location before installation, fully consider the installation site, and prepare the tools and accessories required for installation of TGC transparent LED screen in advance.
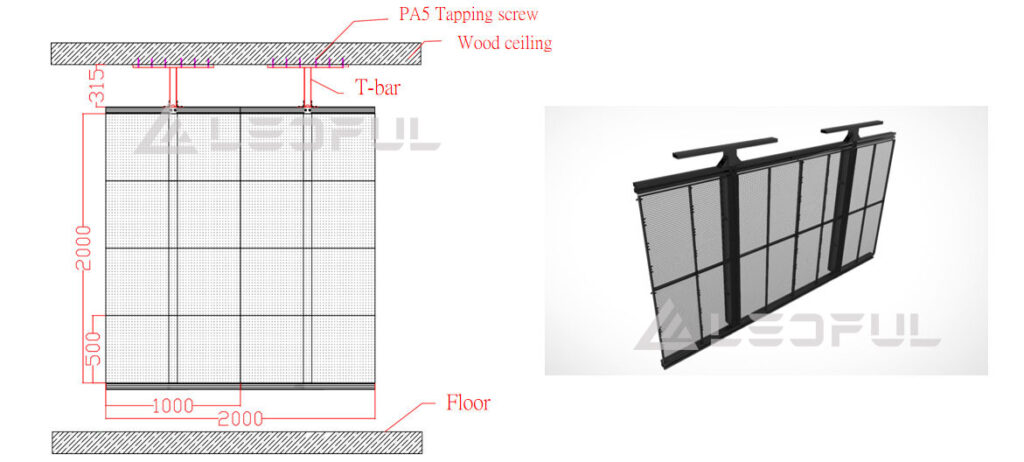
From left to right, pre-measure the installation position, and fix the T-bar to the ceiling with M5 tapping screws (only for wood ceilings); if it is concrete ceiling, you need to use expansion screws to fix it.
Note: Please make sure the ceiling can bear the weight of the TGC transparent LED screen.

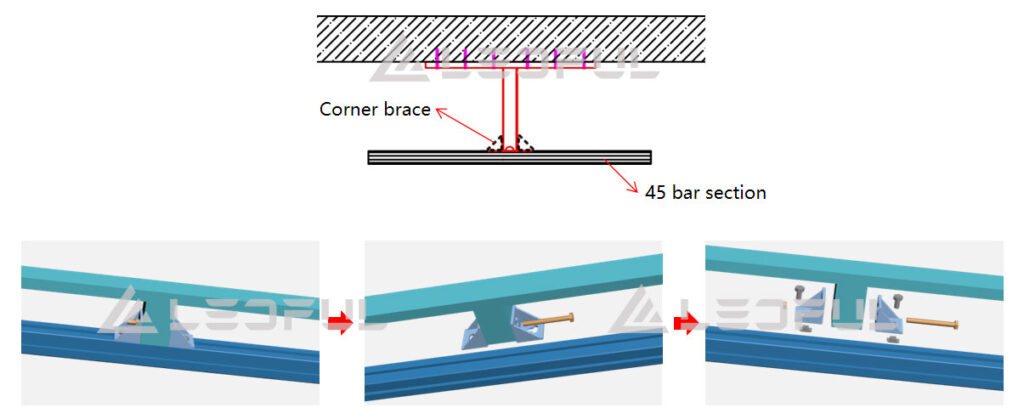
Use M8*80 bolts to pass through the two corners and the T-bar and fix with nuts.
Install the 45 bar section under the 2 corner braces, put the 2 slider nuts into the 45 bar section, push to the desired fixed position, and fix them with 2 M8*16 screws.
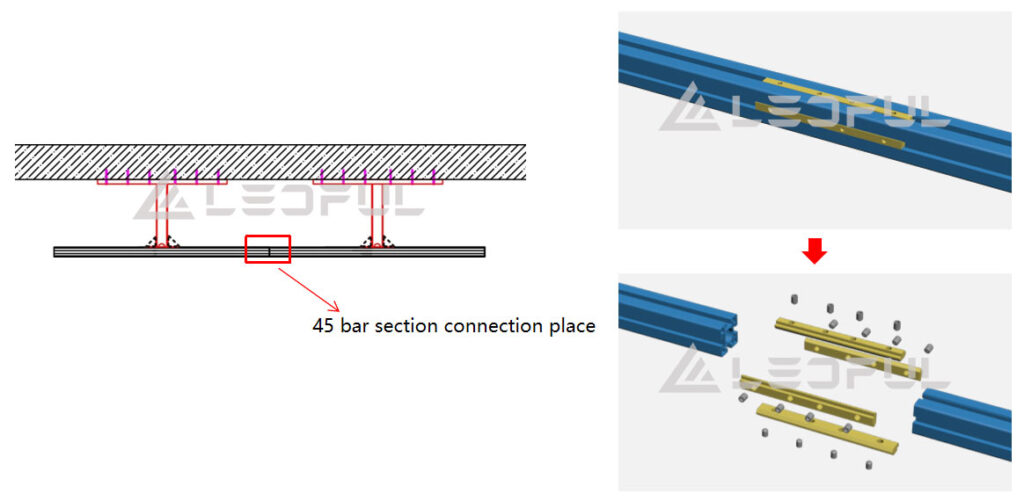
TGC series 45 bar section connection way:
Firstly, put 4 connecting strips into the grooves of one 45 bar section.;
Connect with another 45 bar section, the connecting strip is in the middle of two 45 bar sections, then fix the connecting strips through M8 set screws from LEDFUL.
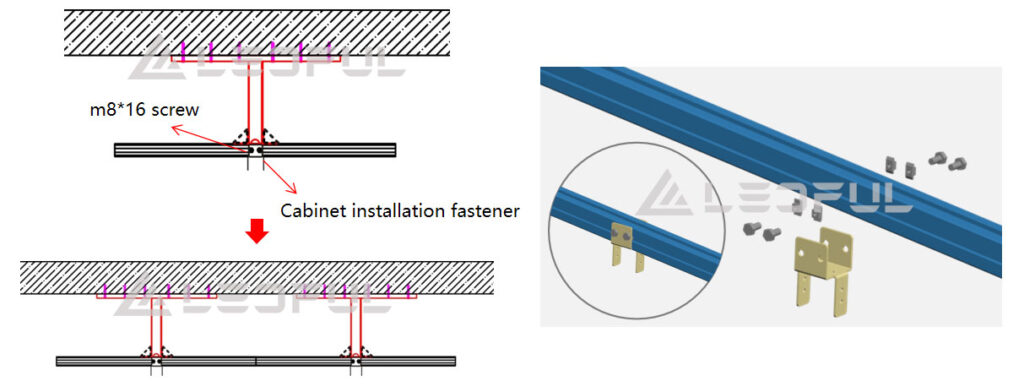
Put the cabinet installation fastener in the middle of the 45 bar section, put 2 sliding nuts on the left and right sides of the 45 bar section, and then fix them with m8*16 screws from LEDFUL.
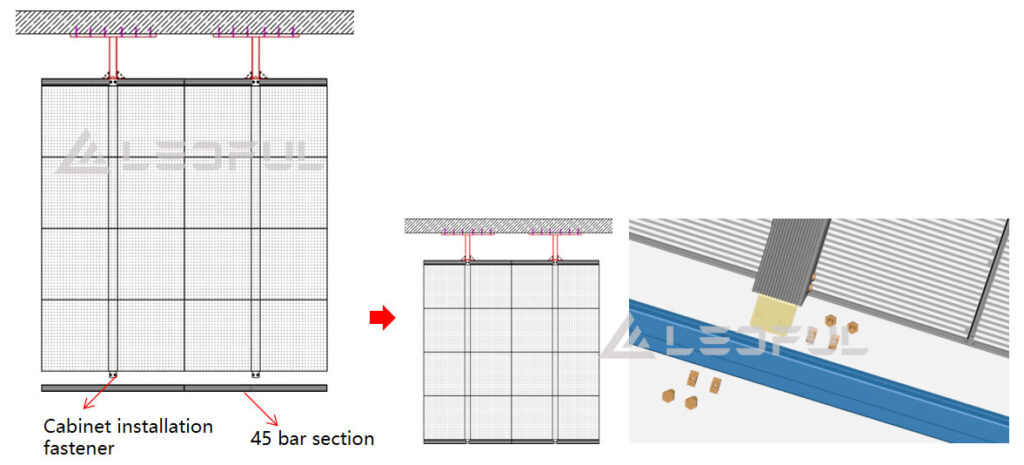
Connect the LEDFUL TGC series LED cabinet to the cabinet installation fastener, and then fix them by 4 m6*10 screws.
Install the LEDFUL transparent LED cabinets one by one in the first row.

Install cabients one by one: Connect cabinet to the fixed cabinet, make the screen flat and stable, then fix the two cabinets together by m6*10 screws.
Fix all L-shape connection plates by m3*6 screws.

Firstly, fix the 45 bar sections at the bottom of each TGC cabinet by m6*10 screws,then connect 45 bar sections together by sliding nuts and m8*16 screws.


lf you would like to have more detailed information, please feel free to complete our feedback form.
lf you would like to have more detailed information, please fell free to complete our feedback form.